Step-by-Step Facebook & Instagram Account Connection in Easy Social Feed
After installing and activating Easy Social Feed, the next important step is connecting your Facebook and Instagram accounts.
This connection allows the plugin to securely fetch your social media posts and display them on your website automatically.
Don’t worry, the process is simple and only takes a few minutes.
Let’s walk through it step by step.
Why Do You Need to Connect Your Accounts?
Before we begin, it’s important to understand why this step matters.
Connecting your social accounts allows Easy Social Feed to:
- Display live Facebook posts
- Show Instagram photos, videos, and reels
- Automatically update new content
- Maintain secure API access
- Improve feed reliability and performance
Without connecting your accounts, the plugin cannot fetch your social content.
How to Connect Your Facebook Account
Follow these steps carefully:
Step 1: Go to Easy Social Feed Settings
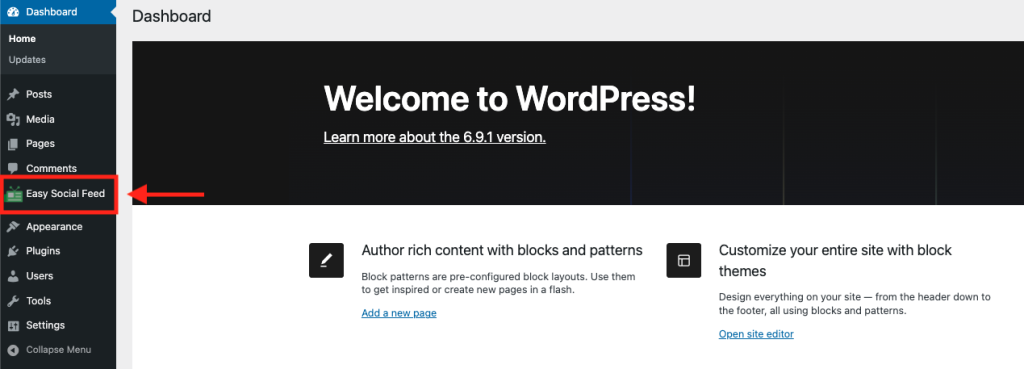
In your WordPress dashboard:
Click Easy Social Feed
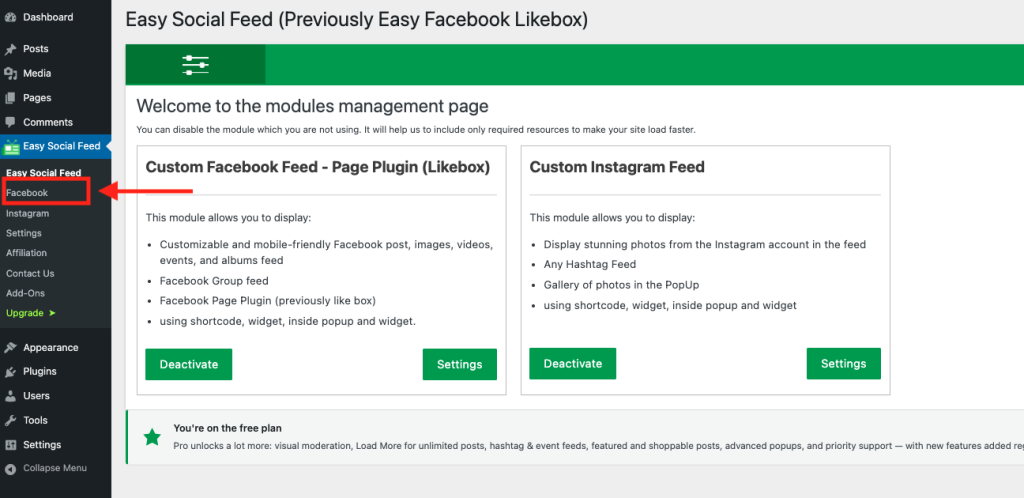
Navigate to the Connect Account section
You will see the option to connect to Facebook.
Step 2: Click “Connect Facebook Account”
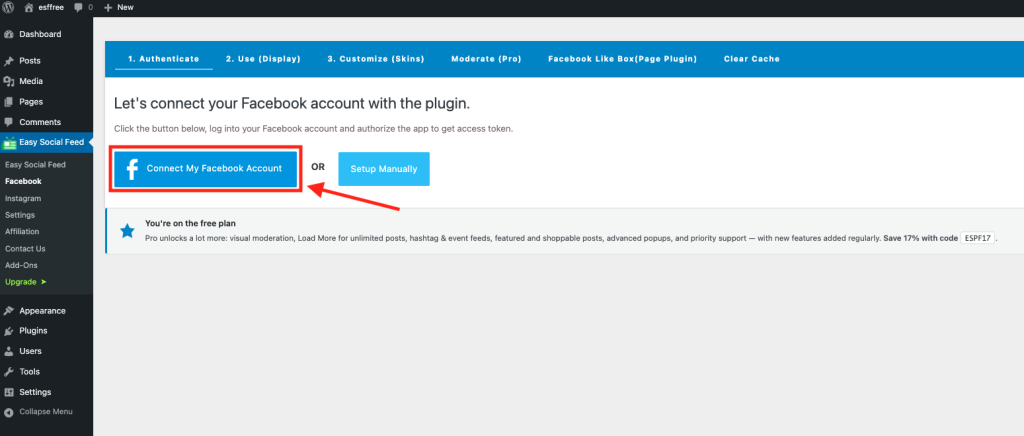
Click the Connect Facebook button.
You will be redirected to Facebook’s official login page.
This ensures the connection is secure and authorized directly through Facebook.
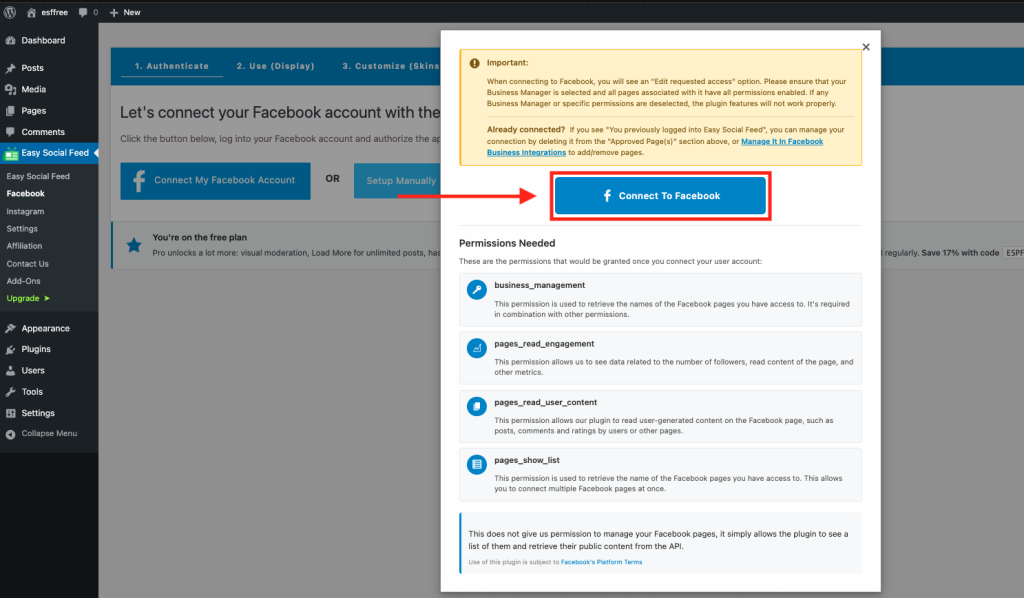
Step 3: Log in to Your Facebook Account
- Enter your Facebook login details
- Click Continue
Make sure you log in using the account that manages the Facebook Page you want to display.
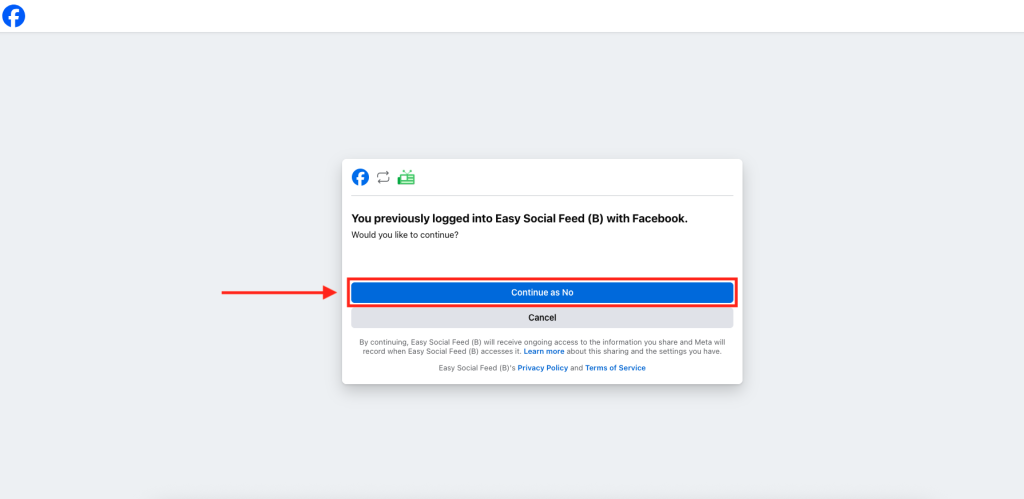
Step 4: Grant Permissions
Facebook will ask you to allow permissions such as:
- Access to your pages
- Permission to read page content
- Access to public profile information
Click Allow or Continue to approve.
These permissions are required to display your page feed.
Step 5: Select Your Facebook Page
If you manage multiple pages, you will be asked to select the page you want to connect.
Choose the correct page.
Click Done.
Step 6: Connection Successful
Once completed, you’ll be redirected back to your WordPress dashboard.
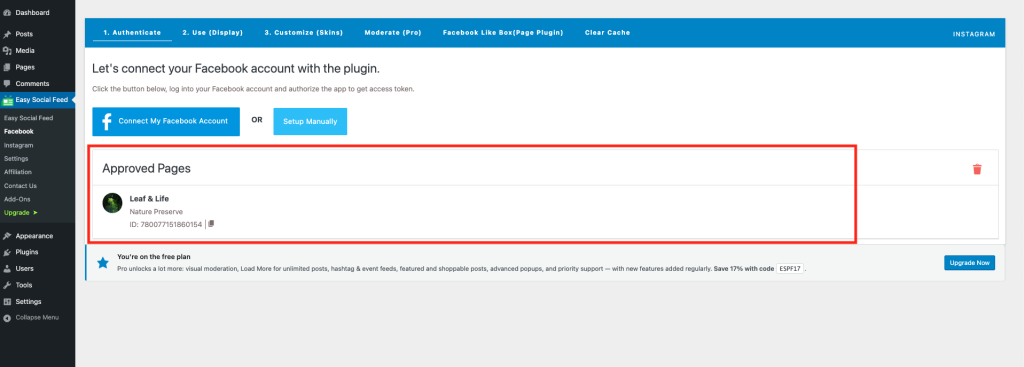
You should now see:
- Facebook account connected
- Page name displayed
- Status showing “Active”
Your Facebook feed is now ready to use.
How to Connect Your Instagram Account
The process is similar and just as easy.
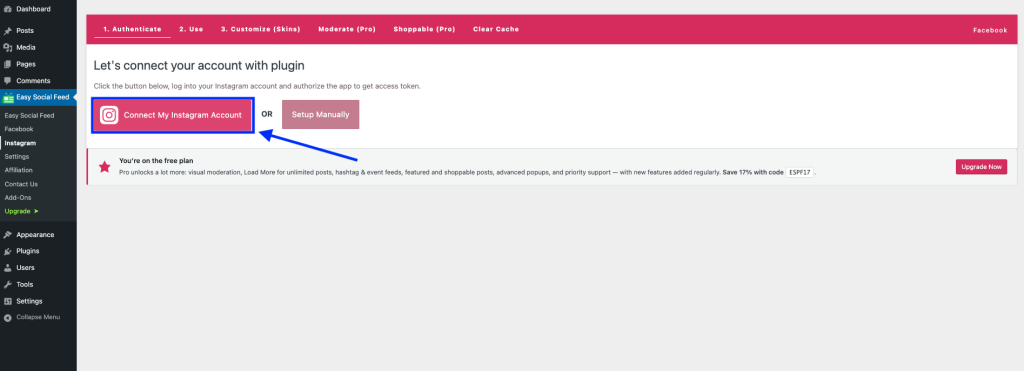
Step 1: Go to the Accounts Section
Inside your WordPress dashboard:
Easy Social Feed → Accounts
Click Connect Instagram Account
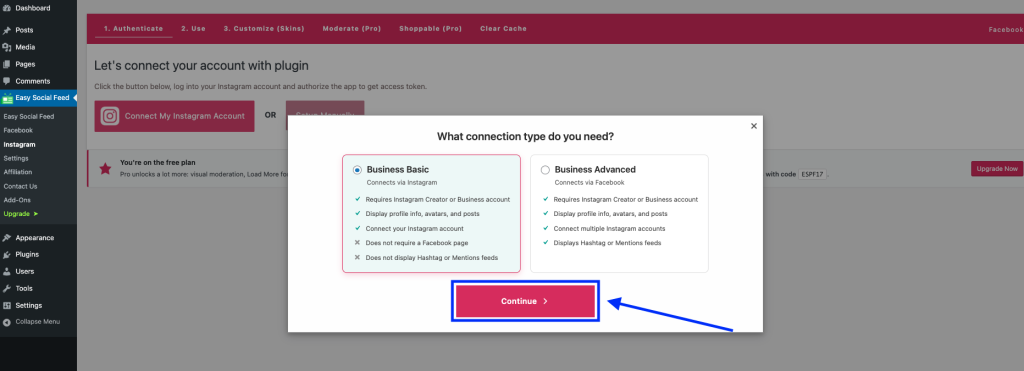
Step 2: Make Sure You’re Using the Correct Instagram Account Type
Before logging in, it’s important to understand that Instagram offers two main types of accounts:
- Personal Account
- Professional Account (Business or Creator)
For the best performance and stable connection, we strongly recommend using a Professional account (Business or Creator).
Step 3: Authorize Access
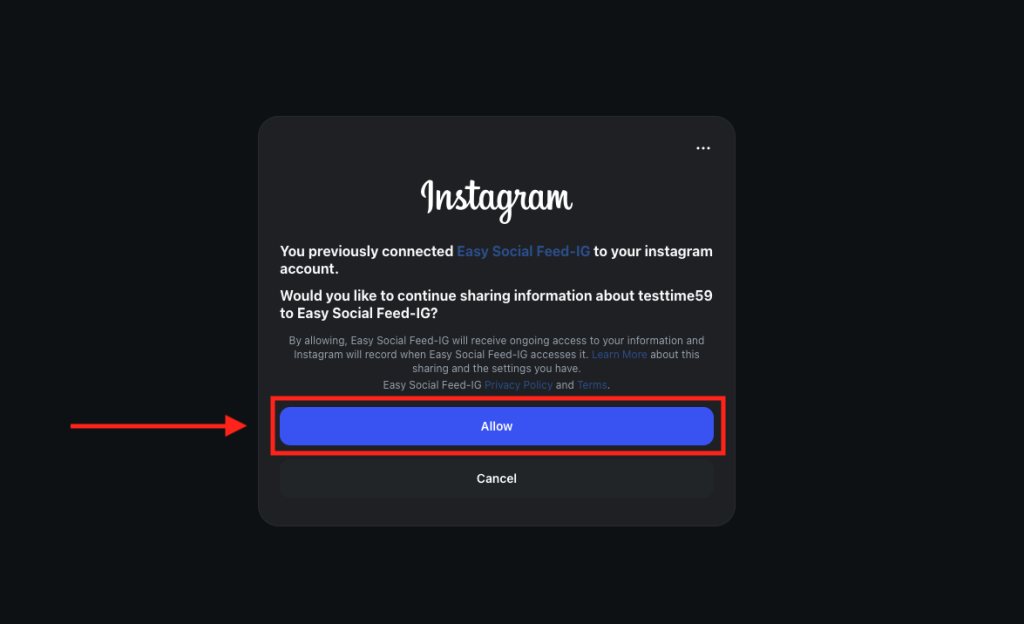
Instagram will request permission to:
- Access your media
- Display photos and videos
- Read profile information
Click Allow to continue.
These permissions are necessary for displaying your Instagram feed on your website.
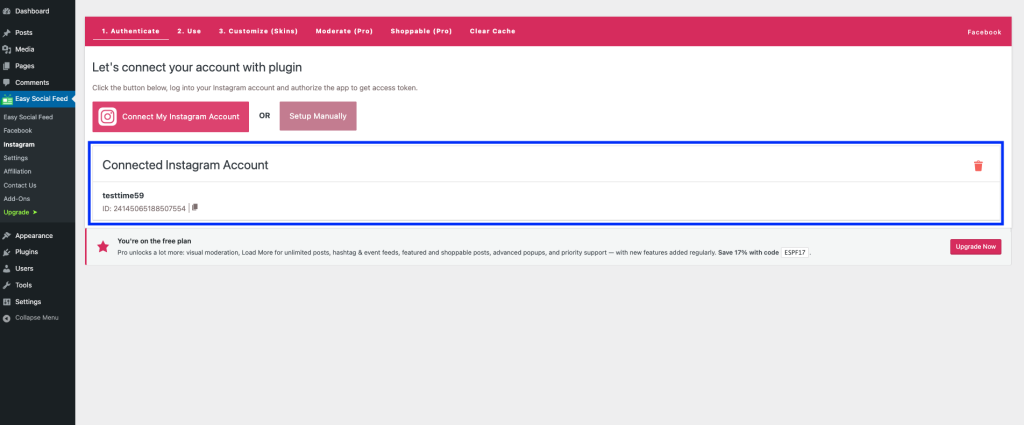
Step 4: Confirm Successful Connection
After authorization, you’ll be redirected back to your WordPress dashboard.
You should now see:
- Instagram account connected
- Username displayed
- Status marked as Active
Your Instagram feed is now ready to display on your website.